Hi all, I've decided to replace the bulbs in the interior, front doors, boot and number plate lights with diode bulbs.
Useful article about types of bulbs used in Camry 40 will duplicate it briefly in case it gets deleted.
The following bulbs are used on Camry XV40 according to manufacturer's recommendations:
1 - high beam bulb, type HB3; 2 - front position lamp and number plate lamp, type W5W; 3 - passing lamp, type H11 (halogen) or D4S (halogen); 4 - front and rear direction indicator lamp, type WY21W*; 5 - lamp of a fog light, type H11; 6 - lamp of a rear stop lamp and parking light, type W21/5W; 7 - lamp of a back lamp, type W16W; 8 - lamp of a rear fog light, type W21W; 9** - lamp of a side indicator light (on a body), type WY5W*.
* The letter "Y" in the name indicates that the colour of the bulb is yellow although the actual colour of the bulb is orange.
Read also: How to grease the cross members and splines on a Land cruiser Prado ?
** These bulbs are not replaceable on the Camry XV40; if the bulb burns out, the lamp assembly should be replaced following the instructions in our handbook.
Lamps used in Camry XV40 interior lighting:
1 - general interior lighting bulb (centre plafond), type C5W (length - 31 mm); 2 - driver and front passenger seat lighting bulb (front plafond), type W5W; 3 - individual lighting bulb (behind sun visor), type W5W; 4 - glove box (glove box) lighting bulb, type T5; 5* - lamp of lighting of cigarette lighter plug ("cigarette lighter socket"), type T5; 6* - lamp in illumination of scale of automatic control mode and "run" of selector lever of automatic transmission control, type T5; 7 - lamp of lighting of front left/right door aperture, type W5W; 8 - lamp of luggage compartment lighting, type W5W.
* The light bulb has a green filter-gum, simply called "condom" by car owners.
After searching the internet, the following items were purchased: 1) PHILIPS 127916000KX2(6000k), W5W (T10) - 5 packs (2pcs in the package). Intended use: - Front doors (2 pcs.) - Cabin light, front (2 pcs.) - Visors, driver and passenger (2 pcs.) - Trunk (1 pcs.) - Rear number plate (2 pcs.)
2) PHILIPS 129416000KX1(6000K), C5W (length - 30mm) - 1 package (1pc). Purpose: - Cabin light, rear. After installation, I noticed that the light from the diode is "more yellow" than other diodes in the cabin, although all have a temperature of 6000K.
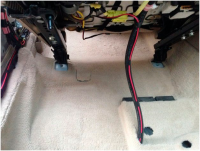
A little about the replacement process General: - Tool: flat thin screwdriver, Phillips screwdriver. - Be aware that the bulbs you are replacing may be hot. - If you insert the bulb and it does not light up, reverse the poles of the bulb. - Replacing during the day, so it may look like the diodes are giving off too little light in the photo.
1) Front doors The door trim does not need to be removed, the light can be easily removed by lifting it from underneath with a flathead screwdriver. The result:
2) Visors, driver's and passenger's Visors Both visors should be removed by lifting the catch on the left side of the visor. The "holding" catch is on the photo:
3) Cabin light, front Pull up the plastic on the side of the windscreen, it's easy enough to snap off.
4) Cabin light, rear Upd:
: without removing the light, try to "unclip" the glass. Note in the pictures below that there are 2 large latches on the diagonal of the plafond, they need to be "defeated".
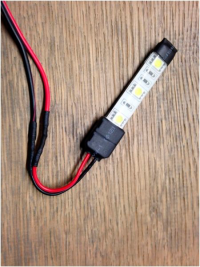
Having snapped off the plafond, we remove the reflector by unscrewing it with a screwdriver. After replacing the bulb, don't forget to put
reflector back in place.
5) Rear number plate Remove the luggage compartment trim: Undo the pistols with a flathead screwdriver and unscrew the handle.
Read also: How to replace/repair a Camry 40 steering column control by yourself
As it turned out, I had one bulb burned out as moisture had got into the plafond.
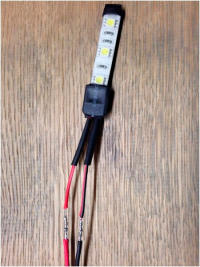
6) Trunk The bulb is easily accessible from the boot and can be removed by unlatching the "protective" plastic.
To remove the spotlight on a Toyota Camry, we'll need the following tools:
a small slotted screwdriver;
a large slotted screwdriver.
It is advisable to disconnect the battery before removing the light.
How to remove the headlamps: front and rear
1. Rear passenger light
How to remove the headlamp in a Camry
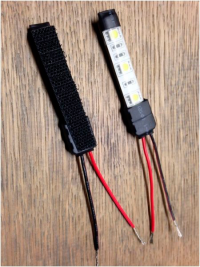
To remove the spotlight, insert a small screwdriver between the body of the spotlight and the push-pull windows, and then pull the windows out of the hooks as shown in the photo. Be very careful! The plastic body of the light fixture is very soft and pliable, and will turn white and crumple with excessive force!
How to remove the Toyota light plug
Do the same with the other glass.
How to remove the spotlight on a toyota camry
The sum of our operations is this.
How to remove the eyecup on a toyota camry 40.
We did all this to gain access to the plafond and ceiling mounts. These are located around the perimeter of the plafond, in the recesses of the lighting and are spring-loaded metal spacers. There are four in total, for better understanding, they are located in the photo below and circled in red. The photo shows the back side of the spotlight, namely the side mounts, the situation is similar on the mounts on the other side.
Removing the plafond in the carAfter performing this technique with all four hooks, remove the ceiling lamp by disconnecting the electrical connector with a slotted screwdriver.
Read also: Choosing struts for Toyota Camry and Toyota Corolla
Headlamp Removal Photo
2. Front headlamp
The front headlamp is held in place by four push-pins positioned in the corners. For a better understanding of the location, see the photo below, which shows the back of the diffuser. The mounting points are circled in red.
How to remove the headlamp of the Toyota Camry: photo
Open the glasses compartment (ochetnik), grab the cover with both hands and pull down firmly. During disassembly, some of the bullets can remain on the body, you will need to remove them with a screwdriver and return to the seats of the plafond.
How to remove the eyecup
Next, unplug the electrical connector using a screwdriver.
Front light connector
To remove the plafond in Camry, it is necessary to be very careful, the plastic is soft and it is possible to repaint parts if handled carelessly.
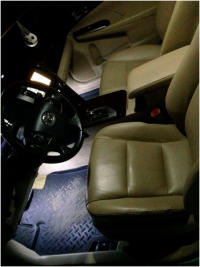
Foot illumination
To install the footlights with your own hands, the car owner will have to purchase the plafonds. The front units are made with adhesive tape. The rear courtesy lights are fitted with Velcro.
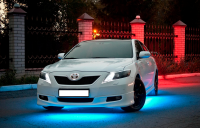
Camry 40 illumination
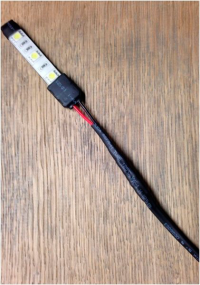
LED surface-mounted lights
Pull the wiring harness out of the cover to connect to the on-board power supply.
Camry 40 lighting
Connect the headlamps to the on-board electrical system by welding
Protect the weld seam with heat shrinkable batiste
Camry 40 lighting
Shrink shrink instead of welding
Protect the routed cable over its entire length with sheeting to prevent damage to the insulation.
Camry 40 illumination
Protect the entire length of the cable
Install the cables under the passenger seat with subsequent transition to the sills.
Camry 40 lighting
Cables under passenger seat
Continue pulling the yarn over the sill
Camry 40 illumination
Yarn across the sill
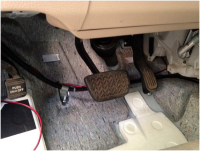
Route the cables for the driver's footwell lighting.
Camry 40 lighting
Route the cable under the driver's footwell
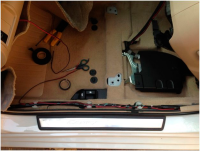
Complete the wiring harness on the second sill and install the rear passenger footwell lights.
Camry 40 lighting
Read also: Error P0016 - what it means, symptoms, causes, diagnosis, solutions
Sill wiring
Camry 40 lighting
Driver side lighting
Camry 40 lighting
Passenger side lighting
Camry 40 lighting
Rear seat footwell illumination

-rear-and-front-view-camera-6.png)

